Click on picture to
|
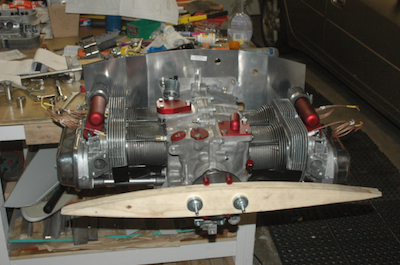
I next started to fit the cooling fences. I was debating whether to do this now or after the engine is mounted. Mostly the installation seems straightforward, but all I got was a sheet of plans without any real directions. I had a couple of questions about what was intended, like where should the CHT probe wires go, do the tabs on the rear fence go inside the supertin or outside and why did they call out eight flush rivets? Since this was a brand new version of the cooling system and engine, I decided I would call and see if they have published more drawings or photos before finishing installing them.
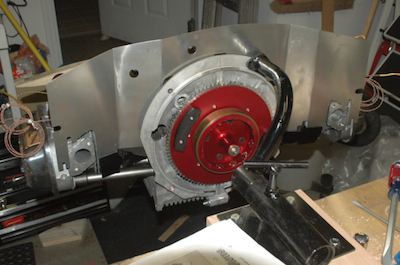
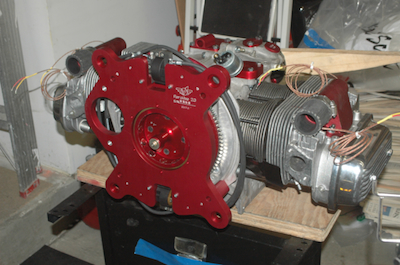
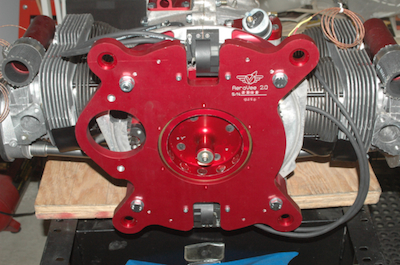
So, that means there is nothing left that can be done on the rebuild stand. So on to my custom rolling engine stand. The remaining pieces attach to the engine case via the large red block fitted and bolted on below. This is one of the really nifty features of the Aerovee conversion. It is really a simple setup that gives you a 20 amp alternator, dual magnetos and dual electronic ignition firing. Looking at the picture above from the rear of the engine, the red plate is the flywheel assembly, for which I have already posted pictures of its installation. There are four elements to this assembly. The main gear for the starter is normal. The other three form half of the core of the conversion and are much more unusual. In this picture above, near the edge of the red plate at the 10 o’clock position, is the counter weight to the (not visible in this view) magnets that drive and trigger the magnetos. Next is a gold colored ring on the outside, that has a series of very strong permanent magnets attached on the inside of the red ring. This is half of the alternator. Inside of this is a plate with a stem. Located on the surface of the roughly one inch diameter stem is a small triggering magnet for the electronic ignition. This one rotating assembly energizes and or triggers the magnetos, electronic ignition and alternator. This is directly attached to the crankshaft, so get everything in position and all timing is dead on and will not need adjusting once it is setup and very little adjusting should be needed.
|