Click on a picture to
|
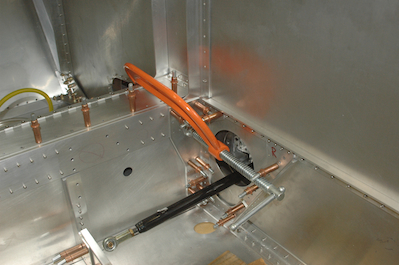
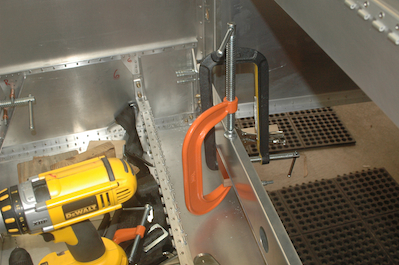
One of the other measures that needed to be taken squared the wing with the fore and aft centerline by measuring from a wing tip to the tip of the tail. Because of the way the wing is constructed, the left wing is 5/32” greater in this dimension then the right. We moved the wing tips as needed until we got this difference. Then we established the wing incidence angle by raising the rear spar of the wings until they are a proscribed distance from the bottom of the fuselage wing skin. This all sounds pretty simple and straightforward but as you adjust each measure you have to recheck and readjust all the others as needed. They all have to be right at the same time. When you get to that point you can clamp everything in place. The first picture shows the main spar clamped after we got everything all lined up. The second picture is after a couple of steps. At this point we now have the shear angle in place and we have it clamped in two directions to both the lower fuselage channel and the rear spar carry through assembly.
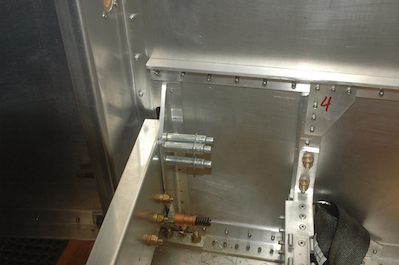
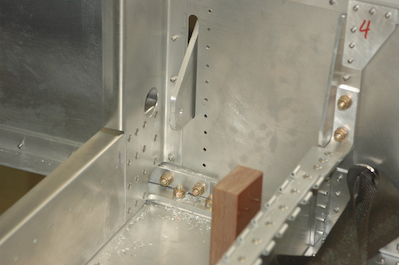
The third and fourth pictures actually show what was done in the missing steps. The vertical angle that is in front of the rear spar carry through was first clamped into place and then drilled and clecoed to the fuselage wall and then to the rear spar carry through assembly. The pieces have all been removed for deburring and additional work outside of the fuselage in the fourth picture.
|